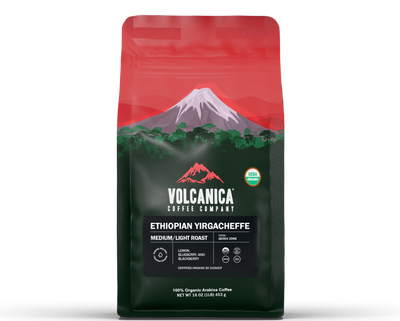
Ethiopian Yirgacheffe Coffee is a unique USDA organic coffee with a complex origin and truly exotic flavor with pleasant acidity. Yirgacheffe is a coffee region in southern Ethiopia that produces distinctively floral and fruit-toned coffees from traditional varieties of Arabica long grown in the region from wild coffee trees.
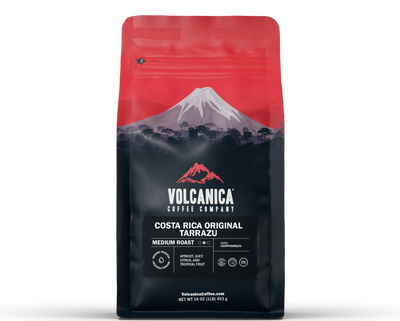
Costa Rica Coffee is grown at high altitudes on volcanic soil, where the cherries ripen more slowly, which gives it a rich and hearty flavor. This single-origin Tarrazu Estate Costa Rica Coffee, known as one of the finest in the world, is master roasted to medium color to preserve the naturally full, elegant, and rich flavors.
Sumatra Mandheling Coffee is a rare Indonesian coffee that is delightfully smooth with a rich, heavy body, low acidity, exotic flavor with an intense syrupy aftertaste, and earthy richness. Rated a low acid coffee due to the lower acidity.
Brazil Coffee is an estate coffee from the Minas Gerais region. It has an amazing taste with hints of sweetness, chocolate notes, balanced acidity, and a pleasantly clean taste.
Ethiopian Yirgacheffe Coffee is a unique USDA organic coffee with a complex origin and truly exotic flavor with pleasant acidity. Yirgacheffe is a coffee region in southern Ethiopia that produces distinctively floral and fruit-toned coffees from traditional varieties of Arabica long grown in the region from wild coffee trees.
Costa Rica Coffee is grown at high altitudes on volcanic soil, where the cherries ripen more slowly, which gives it a rich and hearty flavor. This single-origin Tarrazu Estate Costa Rica Coffee, known as one of the finest in the world, is master roasted to medium color to preserve the naturally full, elegant, and rich flavors.
Sumatra Mandheling Coffee is a rare Indonesian coffee that is delightfully smooth with a rich, heavy body, low acidity, exotic flavor with an intense syrupy aftertaste, and earthy richness. Rated a low acid coffee due to the lower acidity.
Brazil Coffee is an estate coffee from the Minas Gerais region. It has an amazing taste with hints of sweetness, chocolate notes, balanced acidity, and a pleasantly clean taste.
Cupping coffee can seem like one of those erudite, pretentious coffee snob things to do in the coffee industry. In fact, some coffee professionals go so far as to have engraved spoons that they carry around with them like pocket watches, so they can cup coffee at any given moment. Most cupping is done at multiple stages of the coffee’s journey from plant to farm to export to roastery to eventually finding its way to your home, in which any given coffee has been examined, poked, and prodded by a bare minimum of twenty different professionals with a variety of job titles and role within the industry.
But cupping coffee can be an accessible and helpful learning tool to have at your disposal to try and replicate at home to grade and better determine what sorts of coffee’s you like and which coffee’s you’re not so fond of. The main reason why we cup at Volcanica is to ensure consistent quality and flavor with each roast, as well as determining if a crop is beginning to go bad.
Getting Started
To get started, you’ll need a cup, a scale to measure out the coffee and water, a spoon in order to sip the coffee and break the crust on top, a timer, a scorecard or notepad to write impressions, tasting notes, and anything else you want to remember, and, of course, the coffee you are wanting to cup. We recommend using at least one coffee that you know you like as a base reference so you can determine if any new or unknown coffee is up to your liking.
While there is plenty of specialized equipment for cupping coffee, and you can easily purchase it all at Specialty Coffee Association’s (SCA) website, sca.coffee, for those not wanting to pay quite a bit for equipment that will only have one function, then you can just as easily use your standard coffee mug and spoon in your utensil drawer, though make sure to adjust your measurements if doing so.
The SCA’s coffee to water ratio when cupping is 8.25 grams of coffee to 5.07 fluid oz, or when adjusting based on whatever sort of cup you are using, it’s 1.63 grams of coffee to 1 fluid oz. of water. As we said, this can be quite an erudite and exacting exercise, but it helps to be as exacting as possible when determining great coffee.
You’ll start by measuring out the amount of coffee and water you will need based on the cup parameters. Then, before grinding the coffee you’ll use to cup, first take about 2 grams of that coffee and grind it. This is called priming coffee, and it’s used to ensure that the coffee you are wanting to cup isn’t contaminated with other particulates of any previous coffee you ground in the past since grinders will always retain a small amount of coffee from any given grind.
When grinding your coffee, make sure to choose a medium-coarse setting on your grinder, which should be the consistency of coarse sea salt. When you have the coffees ground and in their appropriate cups, you can denote the dry aroma of the coffee. While the dry aroma won’t tell you exactly whether a cup is good or not, it certainly helps preeminently determine what the coffee might taste like.
Once you have all your coffees set up and the water is at 200º F, you’ll start pouring the water, making sure to fully saturate every bit of coffee. Then it’s a matter of waiting. But not too long...
You’ll need to start a timer for 12 minutes. After the 9 minute mark, you will need to break the coffee. This involves you taking the spoon, gently putting it slightly into the cup, not too much, just enough to go right under the crust that has formed, and pushing your spoon in a forward motion through the crust. While you break the crust, you’ll want to have your nose right next to the coffee so that you can take note of the wet aroma of the coffee. This might either confirm or invalidate any notions of the aroma you got from the dry aroma. Though more often than not, the wet aroma will have a pretty different smell since there will be vastly more chemical reactions happening as the coffee brews. In between breaking each crust with your spoon, make sure to rinse off the spoon so that coffee from one sample does not carry over into the next sample.
Removing The Crust
At around the 6 minute mark, it will be time to take the crust of the coffee ground completely off the top. To do this, you’ll take two spoons, place them right above the top of the cup touching one another, and then have them do a circular motion around the top of the coffee, trying to take up as much of the grounds as possible from the crust. There will inevitably still be coffee left in the cup, and that is unavoidable. But so long as a majority has been taken off, then it shouldn't matter too much since you will only be drinking from the top.
Once the 12 minute timer has gone off, you will want to measure the temperature of the coffee and ensure that it is sitting below 140º F, or else you can very easily burn your tongue. Once the coffee is at a nice temperature, but not too cold either, you take your spoon that you have thoroughly washed from previous breaking and disposing of the crusts, and take a spoonful of the control sample, or the coffee that you know you like. When sipping on the coffee, make sure to slurp as loud as possible. This allows the coffee to fully aerate and spray across your mouth and tongue. It might seem uncouth and impolite, but there is a purpose to it.
Slurping & Scoring The Coffee
The slurping can, and should, almost be a little violent. Again, the purpose is to locate qualities and flavors of the coffee that you like and don't like, and unfortunately sipping it like normal will only concentrate the coffee at the tip of your tongue rather than throughout.
Now, there are many different categories that you can score the coffee on. There’s acidity, body, flavor, aftertaste, sweetness, balance, dryness, and etc. We suggest maybe sticking to some basic categories first while you acquaint yourself with cupping, and then maybe adding in different complexities as you get more comfortable. The best ones to start with are body, flavor, and aftertaste. These components play a major role in what you're looking for in your cup of coffee.
If you use a scorecard from the SCA website, that's great, or, if you're not wanting to print out more stuff and want to keep it simple, then you can take a notepad and grade each category from 1-10, which is generally the range most scorecards will use as well, with 1 being absolutely horrible and nearly undrinkable, and 10 being perfect with little to no flaws.
As you go from one sample to the next, make sure to consistently rinse your spoon so that you don't cross-contaminate one sample from the other. If you are cupping with a friend, then this also ensures that you don't accidentally share too many germs.
But once you have finished slurping, scoring, and describing each coffee, you will want to tabulate your scores to determine how each cup of coffee did. This is an incredibly subjective process and your scores can vary wildly on a number of factors, but if you continuously practice and hone your tasting senses, developing your palate and what sort coffees you enjoy, then this process can be very helpful in determining what sorts of coffees you purchase so that you don't accidentally buy an origin, roast, or flavor profile that you know might not sit well with your morning routine.
Click to zoom in furtherClick to zoom out • Drag to pan around
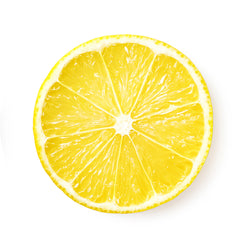 Lemon
Lemon
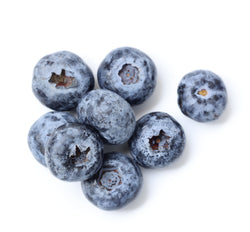 Blueberry
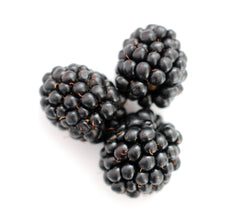 Blackberry
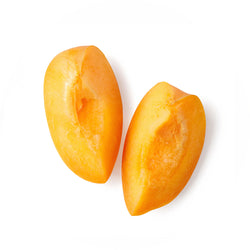 Apricot
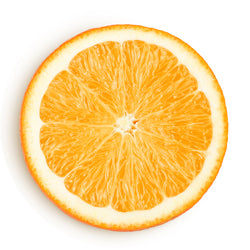 Citrus
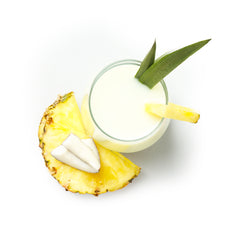 Tropical

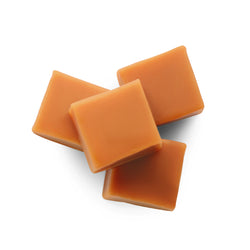 Toffee
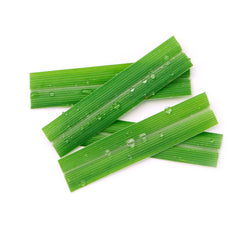 Lemongrass
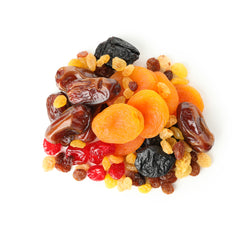 Dried Fruits

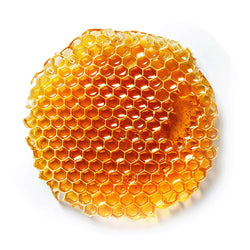 Honey
Honey
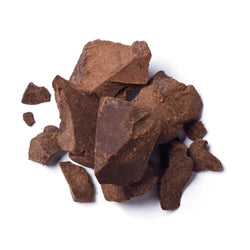 Chocolate
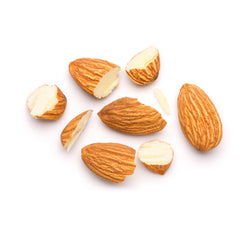 Almond

 Lemon
Lemon
 Blueberry
 Blackberry

 Apricot
 Citrus
 Tropical

 Toffee
 Lemongrass
 Dried Fruits

 Honey
Honey
 Chocolate
 Almond


