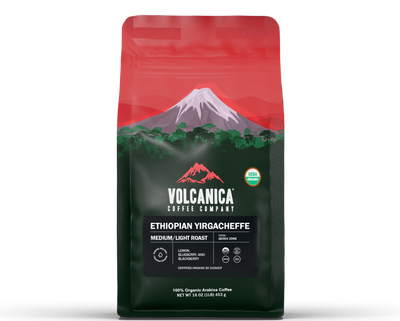
Ethiopian Yirgacheffe Coffee is a unique USDA organic coffee with a complex origin and truly exotic flavor with pleasant acidity. Yirgacheffe is a coffee region in southern Ethiopia that produces distinctively floral and fruit-toned coffees from traditional varieties of Arabica long grown in the region from wild coffee trees.
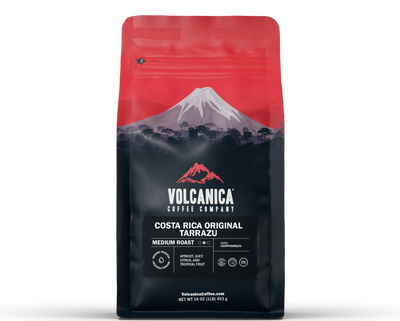
Costa Rica Coffee is grown at high altitudes on volcanic soil, where the cherries ripen more slowly, which gives it a rich and hearty flavor. This single-origin Tarrazu Estate Costa Rica Coffee, known as one of the finest in the world, is master roasted to medium color to preserve the naturally full, elegant, and rich flavors.
Sumatra Mandheling Coffee is a rare Indonesian coffee that is delightfully smooth with a rich, heavy body, low acidity, exotic flavor with an intense syrupy aftertaste, and earthy richness. Rated a low acid coffee due to the lower acidity.
Brazil Coffee is an estate coffee from the Minas Gerais region. It has an amazing taste with hints of sweetness, chocolate notes, balanced acidity, and a pleasantly clean taste.
Ethiopian Yirgacheffe Coffee is a unique USDA organic coffee with a complex origin and truly exotic flavor with pleasant acidity. Yirgacheffe is a coffee region in southern Ethiopia that produces distinctively floral and fruit-toned coffees from traditional varieties of Arabica long grown in the region from wild coffee trees.
Costa Rica Coffee is grown at high altitudes on volcanic soil, where the cherries ripen more slowly, which gives it a rich and hearty flavor. This single-origin Tarrazu Estate Costa Rica Coffee, known as one of the finest in the world, is master roasted to medium color to preserve the naturally full, elegant, and rich flavors.
Sumatra Mandheling Coffee is a rare Indonesian coffee that is delightfully smooth with a rich, heavy body, low acidity, exotic flavor with an intense syrupy aftertaste, and earthy richness. Rated a low acid coffee due to the lower acidity.
Brazil Coffee is an estate coffee from the Minas Gerais region. It has an amazing taste with hints of sweetness, chocolate notes, balanced acidity, and a pleasantly clean taste.
[Video Guide] How to Froth Milk Without Fancy Equipment
09.08.2025
7 MIN READ
Love flat whites, cappuccinos, and lattes but don’t want to splurge on a pricey espresso machine? The good news is you can make café-style drinks at home using simple tools you probably already own. In this guide, we’ll walk through three easy ways to froth milk—no steam wand required—so you can elevate your homemade coffee game.
Frothing Milk FAQ
What’s the ideal temperature for frothing milk? Heat milk to about 60–65°C (140–150°F). Avoid going over 80°C (175°F), as overheated milk won’t froth properly and tastes off.
Can non-dairy milk be frothed? Yes! Choose barista-grade or “foamable” plant-based milks (like oat or almond) for the best results.
Do I need espresso as a base? Not necessarily. A moka pot or AeroPress makes a rich, espresso-like concentrate that works perfectly for lattes and cappuccinos at home.
Step 1: Brew a Strong Coffee Base
Before you froth milk, you’ll need a good coffee base. A moka pot or AeroPress delivers a concentrated, espresso-like brew without expensive equipment. Use freshly ground, high-quality beans—this makes all the difference in flavor. For example, we brewed with Magma Espresso, a medium roast blend with smooth, balanced flavors, ground medium-fine for the moka pot.
Step 2: Heat the Milk
Warm your milk on the stove or in the microwave until it reaches 60–65°C (140–150°F). The milk should be hot to the touch but not boiling. Overheating causes the proteins to break down, leaving you with flat, lifeless foam. For non-dairy options, stick to barista-grade alternatives designed for frothing.
Step 3: Choose Your Frothing Method
Method 1: The Jar Shake
Pour your heated milk into a clean jar (choose one bigger than you need to allow room for froth).
Screw the lid on tightly and shake vigorously for about a minute.
Result: A layer of froth with big bubbles sitting on top of the milk. It won’t win awards for latte art, but it’s a surprisingly effective option using something you probably already have at home. Rating: 6/10.
Method 2: The French Press
Pour your warm milk into a French press.
Pump the plunger up and down rapidly for 30 seconds.
Result: Incredibly frothy and creamy milk, almost too foamy for some tastes. Perfect for cappuccino lovers who want that thick, indulgent froth. The only drawback? It may overwhelm a delicate flat white. Rating: 8/10.
Method 3: The Handheld Frother
Submerge a handheld electric frother in your warm milk.
Froth for just a few seconds until you reach your desired texture.
Result: Quick, creamy, and balanced froth—less intense than the French press but more uniform than the jar. It’s fast, affordable, and delivers reliable results. Rating: 9/10 (the winner!).
Which Frothing Method Is Best?
Each method has its strengths:
Jar: Accessible and budget-friendly, but less consistent.
French Press: Luxuriously creamy, great for cappuccinos.
Handheld Frother: The perfect balance of speed, creaminess, and ease.
No matter which method you choose, you’ll be sipping a café-style drink in minutes—without a steam wand or expensive espresso machine.
Your Turn: Show Off Your Barista Skills
Want to put your new frothing skills to the test? Join our challenge! Snap a photo or video of your homemade latte and tag us with #VolcanicaMagma on Instagram or YouTube. Whether it’s a silky flat white, a foamy cappuccino, or your best attempt at latte art, you could win a free bag of Volcanica coffee.
Ready to take your coffee to the next level? Try our Magma Espresso blend, now available online. And if you’d like to learn more brewing tricks, check out our guides on making rich coffee with a moka pot or AeroPress.
Happy frothing!
Full Video Transcript
"Have you ever wanted to enjoy café-quality flat whites, cappuccinos, and lattes without breaking the bank on an expensive machine? Well, today’s your lucky day. I’m going to show you how to create these drinks at home, and best of all, you don’t need any fancy equipment. In fact, we’ll be using three simple methods to froth milk—two of which most of you already have at home.
I’m Lizzy, and I’m all about helping you make better coffee at home. If you want to learn more about that, then subscribe. We’ll be using three ways to achieve that delicious frothy milk. But first, let’s start with the most important part: the coffee base.
A good strong coffee makes all the difference. If you want that rich espresso-like base, try using a moka pot or an AeroPress. Don’t worry if you’re not familiar with these—we’ve got detailed how-to videos linked in the description and at the end of this video. Make sure to use good-quality coffee, as it’s the foundation of the drink. We’re using whole beans and grinding to a medium-fine for the moka pot. The coffee we’re using today is one of our new coffees, Magma Espresso. It’s a medium roast, washed-process espresso blend.
Once you’ve got the coffee sorted, it’s time for the milk. Heat your milk on the stove or in the microwave until it’s warm but not boiling. Around 60 to 65°C is perfect. Whatever you do, don’t go over 80 degrees. The milk proteins break down and that’s where things can go wrong. Overheated milk won’t froth properly, and you’ll end up with a flat drink that tastes off. A quick pro tip: if you don’t drink cow’s milk, stick with barista-grade or foamable non-dairy milks. They’re designed to froth better and won’t leave you with that disappointing flat foam.
The first method is the jar method. This is the simplest way to froth your milk, and you probably already have a jar lying around at home. Choose one a little bigger than what you need. Once your milk is heated, pour it into the jar, screw the lid on tight, and shake it like crazy for about a minute. It’s a bit of a workout, but it’s worth it. When you pour it over your coffee, you’ll get a decent layer of froth. No fancy latte art, but considering it’s done with something from your recycling bin, it’s not bad. I’d give it a six out of ten.
If you already have a French press, you’re in luck. This is one of the best and most versatile tools for frothing milk. Pour your warm milk into the press, then plunge up and down rapidly for about 30 seconds. It’s super handy that you can also use the same tool to brew coffee. The result is incredibly frothy—perfect for cappuccino lovers. It’s creamy and silky, though for me it’s almost a little too frothy. I’d give this method an eight out of ten.
Finally, for those of you with a handheld frother, this method is all about speed and ease. Just submerge the frother into your warm milk and let it work. It’s powerful, so you only need to froth for a few seconds. This quickly gives you thick, creamy froth in less time than the other methods. It’s perfect if you’re in a hurry but still want a luxurious cup, and handheld frothers are reasonably cheap. The froth is less uniform than the French press version but still creamy and reliable. For me, it’s the happy medium—better than the jar, not quite as intense as the French press. The handheld frother is my winner.
To compare: the jar method gave a lot of liquid milk with a foamy top—not very uniform. The French press gave you pure froth, great for making a decadent latte, though maybe too frothy for some. The handheld frother was quick, creamy, and balanced—my favorite of the three. While none of these methods will get you perfect latte art, they all deliver smooth, delicious froth that rivals the coffee shop.
And now, a little challenge: if you want to win a free bag of Volcanica coffee, show off your barista skills. Snap a video of your homemade latte and tag us with #VolcanicaMagma on Instagram or YouTube. Whether it’s a flat white, cappuccino, or a creative latte art masterpiece, we want to see it—and you could be our next winner.
If you enjoyed this guide, click the next video to learn how to brew strong espresso-style coffee with an AeroPress, or watch our moka pot tutorial. Thanks for watching, and I’ll see you in the next video."
Get 10% off your first order
Join our email list for exclusive offers and the latest news.
Click to zoom in furtherClick to zoom out • Drag to pan around
 Lemon
Lemon
 Blueberry
 Blackberry
 Apricot
 Citrus
 Tropical

 Toffee
 Lemongrass
 Dried Fruits

 Honey
Honey
 Chocolate
 Almond

 Lemon
Lemon
 Blueberry
 Blackberry

 Apricot
 Citrus
 Tropical

 Toffee
 Lemongrass
 Dried Fruits

 Honey
Honey
 Chocolate
 Almond
