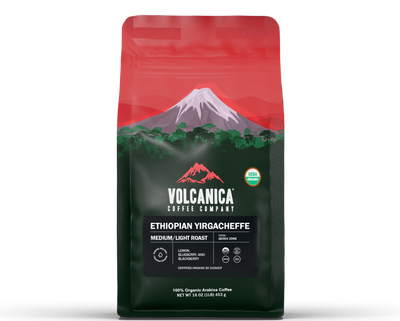
Ethiopian Yirgacheffe Coffee is a unique USDA organic coffee with a complex origin and truly exotic flavor with pleasant acidity. Yirgacheffe is a coffee region in southern Ethiopia that produces distinctively floral and fruit-toned coffees from traditional varieties of Arabica long grown in the region from wild coffee trees.
Sumatra Mandheling Coffee is a rare Indonesian coffee that is delightfully smooth with a rich, heavy body, low acidity, exotic flavor with an intense syrupy aftertaste, and earthy richness. Rated a low acid coffee due to the lower acidity.
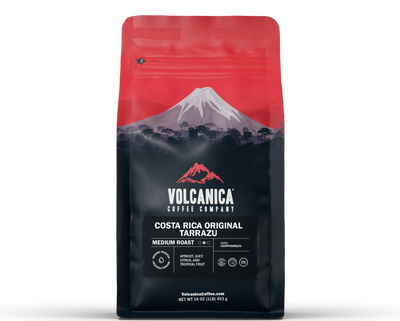
Costa Rica Coffee is grown at high altitudes on volcanic soil, where the cherries ripen more slowly, which gives it a rich and hearty flavor. This single-origin Tarrazu Estate Costa Rica Coffee, known as one of the finest in the world, is master roasted to medium color to preserve the naturally full, elegant, and rich flavors.
Brazil Coffee is an estate coffee from the Minas Gerais region. It has an amazing taste with hints of sweetness, chocolate notes, balanced acidity, and a pleasantly clean taste.
Ethiopian Yirgacheffe Coffee is a unique USDA organic coffee with a complex origin and truly exotic flavor with pleasant acidity. Yirgacheffe is a coffee region in southern Ethiopia that produces distinctively floral and fruit-toned coffees from traditional varieties of Arabica long grown in the region from wild coffee trees.
Sumatra Mandheling Coffee is a rare Indonesian coffee that is delightfully smooth with a rich, heavy body, low acidity, exotic flavor with an intense syrupy aftertaste, and earthy richness. Rated a low acid coffee due to the lower acidity.
Costa Rica Coffee is grown at high altitudes on volcanic soil, where the cherries ripen more slowly, which gives it a rich and hearty flavor. This single-origin Tarrazu Estate Costa Rica Coffee, known as one of the finest in the world, is master roasted to medium color to preserve the naturally full, elegant, and rich flavors.
Brazil Coffee is an estate coffee from the Minas Gerais region. It has an amazing taste with hints of sweetness, chocolate notes, balanced acidity, and a pleasantly clean taste.
If you love the bold flavor of espresso but don’t want to invest in a pricey espresso machine, the AeroPress coffee maker is a game-changer. Compact, affordable, and easy to use, it can produce a smooth, concentrated cup of coffee that mimics espresso—complete with a light crema-like foam. Whether you’re brewing in your kitchen or making coffee on the go, this guide will show you how to master espresso-style coffee using the AeroPress.
☕ Quick FAQ: AeroPress & Espresso
Can AeroPress make real espresso? Not exactly. Traditional espresso requires 9 bars of pressure, which AeroPress cannot achieve. But with the right recipe, you can brew a strong, espresso-style concentrate.
What’s the best grind size for AeroPress espresso? Medium-fine grind works best—finer than drip coffee but not as fine as machine-pulled espresso.
Is the inverted method better? Yes. It prevents premature dripping, improves extraction, and gives you more control over flavor.
What coffee beans work best in AeroPress? Freshly roasted specialty beans, like Sumatra Mandheling for earthy notes or Ethiopian Yirgacheffe for fruity flavors.
Flip & Plunge: At 2 minutes, flip onto your cup and plunge with steady pressure.
👉 The result is a rich, concentrated brew with a light crema. Enjoy it straight, with frothed milk for a latte, or diluted with hot water for an Americano.
Why the Inverted Method Works
The inverted AeroPress method is favored by most World AeroPress Championship winners because it:
Prevents water from dripping too soon
Maximizes extraction for fuller flavor
Produces a stronger, smoother cup
This method is perfect for espresso-style recipes since it uses less water and requires more control.
Classic AeroPress Recipe (Balanced Brew)
For a more traditional cup, try this championship-inspired recipe:
Ingredients:
30 g coffee (medium-coarse grind)
150 g hot water (185–195°F, cooler for darker roasts)
Steps:
Invert AeroPress and add coffee.
Pour 150 g water, stir vigorously back and forth.
At 30 seconds, attach rinsed filter.
At 1 minute, flip and plunge slowly, finishing at 1:30.
👉 This produces a smooth, balanced coffee. Dilute with hot water if you prefer a lighter cup.
Adjust water temperature: Cooler water for dark roasts prevents bitterness.
Experiment with ratios: Stronger brew = less water, finer grind.
Back-and-forth stir: Ensures even extraction without creating a dome.
Final Thoughts
The AeroPress proves you don’t need an expensive machine to enjoy espresso-style coffee at home. With the right recipe and method, you can create café-quality drinks anywhere.
If you’re ready to start experimenting, explore our freshly roasted specialty coffees—from bold Sumatra Mandheling to fruity Ethiopian Yirgacheffe—and bring the world’s best beans into your cup.
"Today we're going to talk about this incredible piece of brewing equipment: the AeroPress. There are a bunch of fantastic recipes out there, but we want to show you one we found which gives a delicious espresso-style coffee with that rich, beautiful crema. And then later on in the video, we'll share our go-to everyday AeroPress recipe inspired by the World AeroPress Championships.
Hi, my name's Lizzy, and I'm all about helping you make better coffee at home. So, if you want to up your coffee game, consider hitting that subscribe button.
First things first—it's important to note that you can't make actual espresso with an AeroPress. But you can make something that's similar and costs a fraction of the price. In a typical double shot of espresso, about 18 g of finely ground coffee beans are met with approximately 36 g of near-boiling water. This mixture is then subjected to high pressure, specifically nine bars, over a span of 25 to 30 seconds.
This intense process triggers the release of carbon dioxide from the beans and the emulsification of their inherent fats and oils. The delightful outcome? That rich crema we all adore, whether savoring it in a straight espresso or relishing it in creamy beverages like flat whites and lattes.
Even if you could put that amount of pressure through an AeroPress, there's a good chance it would explode. But luckily, we've been doing some thorough testing and research to come up with a recipe which will get you some pretty close results. We're super excited to share it with you today.
There are a few important tips we have for you before getting started. First of all: your coffee selection. As always, you want some good, fresh coffee, and you'll want to grind it yourself. This is essential for making sure your shot has the most life in it. If you're using old or pre-ground coffee, you're going to end up with a flat-tasting shot.
We're going to be using the Sumatra Mandheling medium roast coffee today. It has notes of toffee, lemongrass, and dried fruit. If you want to try some incredible coffees, we currently have 20% off your first order. Just use the promo code on the screen and the link in the description down below.
The next important thing is the grind size. For this recipe, we're going with a medium-to-fine grind, which is not as fine as you would for espresso out of a machine. But as we mentioned, it's not espresso. So we're going to go with 4 on the Fellow Ode Brew Grinder V2.
The next thing is the AeroPress technique. There are two ways that you can brew with the AeroPress. The standard way is where you just sit it on top of the cup with the filter on the bottom, pour your coffee and water in, wait, and plunge. Or the inverted method, where the filter goes on last—so coffee and water go in, filter, flip, and plunge.
We'll be using the inverted method today, and here's the reason for this: as we're only using a small amount of water, we want to make sure that we're getting the correct extraction. When you brew in the traditional way, water will start to leak out of the bottom as soon as you pour the water over, leading to less extraction. By inverting the AeroPress, you can make sure no liquid is lost and you can give the beans enough water to achieve an adequate extraction.
The inverted method gives you a lot more control over the extraction process of your coffee—which is probably why nearly all of the AeroPress award-winning recipes use this technique. By the way, if you want to have a look at some of the AeroPress World Championship award-winning recipes, you can on their website. I'll put a link in the description below.
Okay, so time for the recipe. We're going to be using 18 g of coffee to 60 g of water. First thing to do is get the water boiling, and then weigh out 18 g of our beans. Now we've weighed out the beans, we're going to grind them to a medium-fine coarseness—maybe a little bit more towards medium. So we're going to go with 4 on the Fellow Ode Brew Grinder. It should look like this.
Then, just slide the AeroPress about a third of the way in and place it upside down on your scales. Make sure you put it far enough in, because you don't want it going everywhere and making a mess.
Now you want to add the coffee to the AeroPress. Quick tip here: use the little black funnel to pour your beans in. It makes less mess. Once you've zeroed the scales, you're going to want to add your 60 g water. As soon as your water hits the coffee grounds, set a timer for 2 minutes.
Now give the beans a good amount of agitation with the little stirrer that comes with it. You want to make sure to stir in a back-and-forth motion, not a circular motion. If you stir in a circular motion, you end up with a dome which can lead to an astringent flavor in the final cup. The stirring is to make sure the beans are fully saturated so the extraction occurs properly. They'll also start releasing that CO2, which will add to the crema-like finish.
Whilst we're waiting for that, we'll add a filter into the chamber. I like to give mine a quick rinse, but this isn't essential. Then we're just going to screw that on the top of the AeroPress.
Okay, so the time has hit 2 minutes. I'm going to put my cup on the top and flip. And now we're just going to give it a good plunge with a good amount of pressure. Look at that result—look at the crema! It looks good. It's definitely not the same as something you'd get from an espresso machine, but it's got some good crema-style foam that looks like a nice, strong brew.
Time for the taste test… Mmm, it's nice. It has a good amount of acidity, it's strong, not bad. You could easily add some frothed milk to this to give you something similar to a latte, or you could dilute it with some water for more of an Americano-style drink. Give it a go and let me know what you think. I'd love to hear your recipes down in the comments below.
Next up, we're going with a more traditional AeroPress recipe. If you do check out the World AeroPress Championship winning recipes, you'll notice they have a few things in common. Most use the inverted method. Most use 28 to 35 g of coffee. They usually use a rinsed paper filter and a medium-coarse to coarse grind size.
Side note: this was before the 18 g rule was introduced in 2021. Luckily, I'm not restricted by such rules, and I can do whatever I want. For our recipe, we're going to use a 1:5 ratio—so 30 g of coffee and 150 g of water.
We're going to go for a medium roast coffee, so we'll have just under 90°C water. If you're going for a darker roast, you might want to use slightly cooler water, something like 85°C. So first, we're going to weigh out 30 g of coffee, and then grind it to medium-coarse—about 7.5 on the Fellow Ode Brew Grinder. Then we're going to invert our AeroPress and add the coffee.
Now we've inverted the AeroPress, added the coffee, and placed it on the scales. Zero it. Start a timer as soon as you add 150 g of water. Fully saturate the grounds and give it a vigorous agitation with a spoon or the AeroPress stirrer. Again, use back-and-forth motions, not circular, because you don't want that dome on top.
By this time, we should be up to the 30-second mark. We'll add our rinsed filter to the top of the AeroPress and let it sit until we get to the 1-minute mark. At 1 minute, add your vessel on top, give it a flip, and slowly press down. This should take you to the 1 minute 30 mark.
And there we have it—a deliciously extracted cup of coffee. Give it a taste, and feel free to dilute it further according to your taste preference. As always, the key to great coffee is to experiment.
So give these recipes a go and let us know down in the comments how you got on. Which recipe do you prefer? We hope you found this video useful. Don't forget to subscribe for more coffee tips, and if there's anything you'd like to see in the future, let us know in the comments. See you next time!"
Get 10% off your first order
Join our email list for exclusive offers and the latest news.
 Lemon
Lemon
 Blueberry
 Blackberry

 Toffee
 Lemongrass
 Dried Fruits
 Apricot
 Citrus
 Tropical

 Honey
Honey
 Chocolate
 Almond

 Lemon
Lemon
 Blueberry
 Blackberry

 Toffee
 Lemongrass
 Dried Fruits

 Apricot
 Citrus
 Tropical

 Honey
Honey
 Chocolate
 Almond
